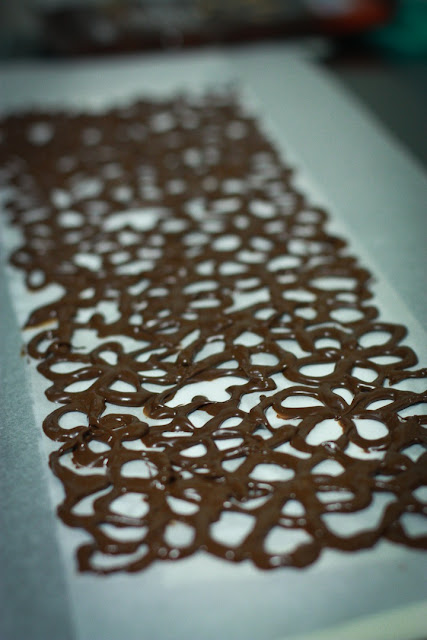
To make this easy yet stunning chocolate lace cake
I baked two chocolate cakes and left them to cool. (I cut off the tops to make them flat)
Then I covered them in vanilla frosting, just a thin layer - according to my youtube sources its called a crumb layer. Then I refrigerated the cakes till the frosting hardened.
Next I covered the cakes in a second layer of frosting - I used this nifty spatula thing which I picked up for super cheap at Homeplus (for those of you in Korea).
Then I placed the *pattern that I wanted on my cake (which I had fitted to my cake before I covered it in frosting) on the table. I put down a large layer of wax paper. AND then a second layer of wax paper which is also the same size as the cake (I taped all of this to the table).
Then I melted the chocolate and used this plastic thing that I also found at Homeplus, but I think a ziplock bag with a snipped off corner might have worked better.
As you can see it doesn't look exactly like the original pattern, but I expected a WAY worse end product.
It dries quite quickly so you need to make sure that you pipe the chocolate out quickly. When it is very close to setting, but still slightly soft - you should pick it up and wrap it around the cake.
Judging when the chocolate was ready was probably the most difficult part of this experiment. NB TIP: if you leave edges on your wax paper (about 3cm on the left and right sides) it makes it easier to pick up.
I peeled off the wax paper super carefully.
And decorated it with some strawberries we had.
Mission complete - WHOOP WHOOP!
This might be easy for the general baking public, BUT it was a massive achievement for me.
You can do it too - and if you do, please send me photos of your marvelous creations!
*by the way, for the pattern - I found a picture of a lampshade with this pattern on, enlarged it, printed it and photocopied it a few times, taped it together and cut it to size (find a pattern that you like and go for it!)
By bee-inspired


